Showing posts with label bracelet. Show all posts

Friday, May 3, 2013

Spring pastel bracelets


It's time to say goodbye... to blogspot! But also HELLO to new MARIAJUSTDOIT.COM Check what's goin on there...
BEST,
MARIA!

That was quick decision. Three wooden bracelet, pastel color, touch of gold and two stones. Simple and stylish. You don’t need any extra skills just 15 minutes to do it.
So are You ready? Just Do IT!
To make bracelets You need: 
-          3 wooden bracelets
-          glue
-          gold and silver decoupage flakes
-          paint brush
-          acrylic paint
-          all purpose glue 


Put some glue on the top of bracelet.

Gently glued gold and silver flakes. 


Wait until dry. Cover with wood spray. 


 Paint bracelet with light pink acrylic paint.

Wait until dry.

Use big flat stone.

Glued with all purpose glue.

Paint with four different colors ( I used grey, light blue, lemon and beige).

Wait until paint is dry. Glued stone with all purpose glue.

Thaaa daa...


 Enjoy! 
 Maria


Tuesday, October 23, 2012

Glamorous jewellery box


It's time to say goodbye... to blogspot! But also HELLO to new MARIAJUSTDOIT.COM Check what's goin on there...
BEST,
MARIA!


   There is always not enough space for Your jewellery! So it means that You need more storage for all kind of rings, bracelets, necklaces and other bling bling things! Well here is solution – glamour jewellery box where You can keep all Your shiny details in one place. Just use wood box, paint and lots of glitter with velvet touch to make practical and stylish accessory. So Just do it!

You gonna need:

-          6 kitchen sponges
-          scissors
-          wooden box ( diameter 18 cm)
-          vinyl glue
-          blue paint (tempera or spray)
-          glitter
-          velvet ribbon (52 cm)
-          needle and thread
-          piece of velvet (27 cm x 37cm)
-          glosy spray finish


Place sponges next to each other.


Copy the shape of the box.


Cut the curves.


Check all the pieces if they match.


Pair and glue sponges. 


Cut a piece of velvet ( 27cm x 37 cm – for box with diameter 18 cm)
We work the size of the inset out by creating the square, whose side equals the diameter of the box. Then add 9 and 19 cm to created sides so that to achieve the rectangle.


Place sponges on a fabric (the fabric should be between them). Pin down spare velvet.


Paint the box twice - outside and inside. Wait until dry. Place sponges with velvet.


Mix glue and glitter into a thick paste. Apply on a lid. 


Cover the entire surface – tab if You need it.


Allow glue to dry (even 24 hours), then spray with glossy spray finish.
Glue velvet ribbon (36 cm) 


Make and attach a bow (need 16 cm)


Thaaaa daaa!


 Enjoy!
Maria!


Sunday, September 2, 2012

Summer moved on


It's time to say goodbye... to blogspot! But also HELLO to new MARIAJUSTDOIT.COM Check what's goin on there...
BEST,
MARIA!
Summer moved on! Holydays official over but in camera still lots of pictures captures lovely memories from trip to Rodos. What U can find there? Amazing beaches, pure, deep blue sea and delicious food.
So... are You ready to go?


Stylish summer of course with two bracelets with Swarovski crystals.


and pink quartz rope bracelet


Monday, July 9, 2012

Spirit of summer


Summer is here! Hot and fantastic! If You have a time go to the beach enjoy ocean! Sea is a perfect inspiration to create a summer bracelets. One with hot mint color and stylish pearls and the other with turquoise cord and gold-ish desert-sand stone. Is there anything better to style-up your summer outfit?! 
Check it and if You like it let me know!


Tuesday, March 27, 2012

Spring DIY - opal bacelet


It's time to say goodbye... to blogspot! But also HELLO to new MARIAJUSTDOIT.COM Check what's goin on there...
BEST,
MARIA!

Spring is in the air! Time to add some fresh and simple jewellery to outfit. Idea? Opal bracelet! It’s easy to make and perfect for everyday and special occasions. Let’s do it!


You need:

  • pink cotton string
  • 16 opal beads (8 mm)
  • 2 flat silver beads
  • silver feather charm


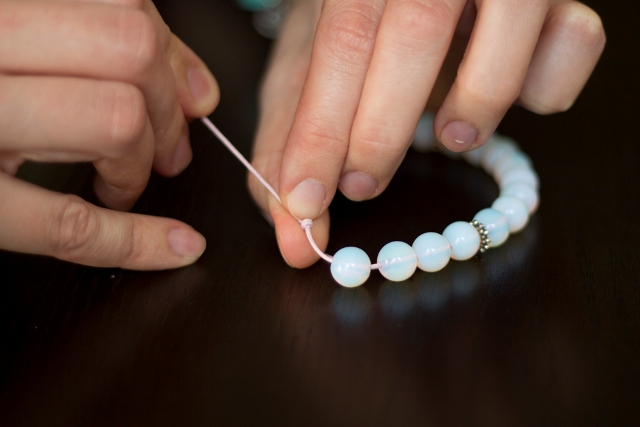
 Thread 4 beads and add flat silver, then another 8 opals and silver one.


 Both endings should have about 12 cm long.


  Finish endings with knots.


Make sliding square knot closure fallowing the instructions.


Thaaaa daaa! Bracelet is ready!!!! 


Good Luck & Have Fun!!!
Maria